{{item.Subject}}
A Guide to Water Heater Inspection
Learn about events, happenings and more
A Guide to Water Heater Inspection
Wednesday, 31 October 2018 | Mike Leano
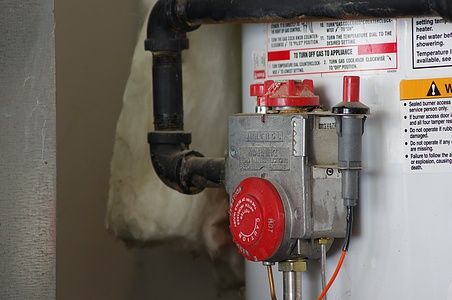
Copyright main image by Scott Akerman
Your home's hot water usage largely influences your energy consumption. To keep your usage and expenses under control, see to it that you perform a water heater inspection regularly.
We've discussed this previously in a previous home maintenance checklist , but didn't delve on the details. Today, we look deeper and discuss how to thoroughly examine your water heater.
Things to do before inspection
But before you start, make sure you do the following:
Wear protective clothing
At the very least, wear trousers, shoes and gloves. Don't do this task while barefoot, or wearing open-toed footwear and/or shorts. Hot water splashing from the heater could scald your legs and feet. The gloves will protect your hands.
Locate the water heater
The first place to check is your garage or basement. If it's not there, it should be located near your water and gas supply lines, or inside a utility closet.
Still no luck? Try listening to it switch on or off; this happens when you use hot water.
Get acquainted with your heater
To make this project easier, take the time to learn the most important parts of the heater. These include:
- The inlet pipe, which is where the cold water passes through to enter the heater.
- The outlet pipe where the hot water exits.
- The gas or electric shut-off controls.
- The temperature and pressure release (TPR) valve. It opens to release pressure build-up in the device when it gets really hot.
- The anode rod, which protects your heater from corrosion.
Switch off the power
Before inspecting, you need to turn off the power from the main fuse box and/or shut off the gas supply to your water heater for safety. You or a plumber will likely do several other procedures on the heater later on.
Step #1: Examine the heater's condition
Look at the overall condition of your water heater. Keep an eye out for:
- Leaks - Look for drips around valves, pipes, the water heater pan, and the surrounding floor.
- Corrosion - You may encounter rust near the piping or burner. It may be caused by moisture in the area where the heater is installed.
- Blackened sections - This may occur near the burner due to backdrafts or poor combustion.
- Odd noises - Does your water heater crackle or whistle?
If you have a gas-powered water heater, pay close attention to its venting system.
- If the pilot light's flame is weak and yellow, it may need to be adjusted or fixed.
- Is there any damage to the vent's pipes?
For electric water heaters, test the heating element - particularly if your hot water runs out more quickly than it used to. Here's a quick guide how:
Step #2: Flush out the tank
Now is a good time to empty the water heater tank to remove accumulated grime and sediment, which can:
- Stick to the heating element and form a layer of crust that can interfere with the water heating and reduce the device's efficiency.
- If enough sediments accumulate at the bottom of the tank, it can clog the drain valve.
Here's how it's done:
1) If you haven't already, switch off the power (from the breaker) and/or shut off the gas supply to the heater.
2) Attach a garden hose to the drain valve. Position the other end of the hose to the nearest floor drain.
3) Close the water supply or inlet pipe.
4) Open any hot water faucet in the house. This will relieve the system pressure in the tank.
5) Open the drain valve to flush out the water.
6) When you're done: close the drain valve, remove the hose, and open the water supply/inlet pipe. When water starts flowing through the faucet, switch it off and turn the power/gas supply back on.
Tip: Attach a stocking at the end of the hose via a rubber band before draining. The mesh will filter the sediment and show you how often you need to flush.
- If you have enough residue to fill a cup, flush more frequently.
- If the residue is just enough for a tablespoon, it's par for the course.
Step #3: Inspect the anode rod
The anode rod is meant to slowly dissolve so that the heater's tank won't corrode. Inspect its condition; if the rod is depleted, it won't protect your tank from rust. When this happens, it needs to be replaced.
Step #4: Check the TPR valve
The TPR valve is a vital safety device. Too much pressure can damage the heater and even your home, so it should always function at peak efficiency.
Here's what you should look out for:
- If there's water on the floor around the heater and there's no tank/plumbing leak, it may have been the TPR valve recently opening itself to ease the water pressure.
- What's the temperature on the heater's thermostat? By law, water stored in the tank should be kept at least 60°Celsius to prevent bacteria growth, but shouldn't exceed 50°Celsius when delivered to the home for personal hygiene (to avoid scalding and injury).
- Is the expansion tank still working? Inspect it by removing its cap and pressing in the Schrader valve (like the ones on tyres). If water comes out, the tank needs to be replaced.
If the TPR valve releases water regularly, you'll have to check your home's water pressure by attaching a pressure gauge to a faucet. According to the National Plumbing Code (AS3500:2003), pressure in any building shouldn't exceed 500kPa (about 72psi).
If your home's water pressure is higher, you'll have to install a pressure reducing valve.
As for the thermostat, make sure it's not set too high. Otherwise, the TPR valve will keep discharging to relieve the pressure and heat inside the tank.
Step #5: Check the venting system
If your water heater is gas-powered, you also need to inspect its venting, which can get clogged with various objects (e.g. bird and squirrel nests). Here's how:
1) Turn the thermostat all the way up for a moment. Don't touch any of the pipes - they're hot.
2) Place your hand next to the gap between the vent and the top of the water heater. You should feel cool air moving past your hand. This means the air is being pulled in through the draft diverter and out the chimney. This means the venting is working as it should be.
3) Another way to check the venting is by holding a lit match between the gap. If the flame is being pulled in, there's sufficient draft in the water tank.
Note: Remember to switch the thermostat back to its previous setting.
More water heater options
ALLBIDS runs many online auctions for your water heater needs. We provide layers of protection on each auction, which means you can bid with confidence. So look for the right heater today.
If you're looking to sell your water heater, you can also use ALLBIDS to maximise your return, minus the hassle. Get in touch with us today to find out how.
|
|
